InstagramFollow Me on Pinterestgoodreads

Sunday 31 August 2014

3 Simple Back to School Projects


Well.. it's that time of year again- back to school time! Woopdeedo! Ya, don't worry, we aren't all that excited either, but we do have a few diy back to school supply projects that just might make heading back to class a little bit easier for you! 


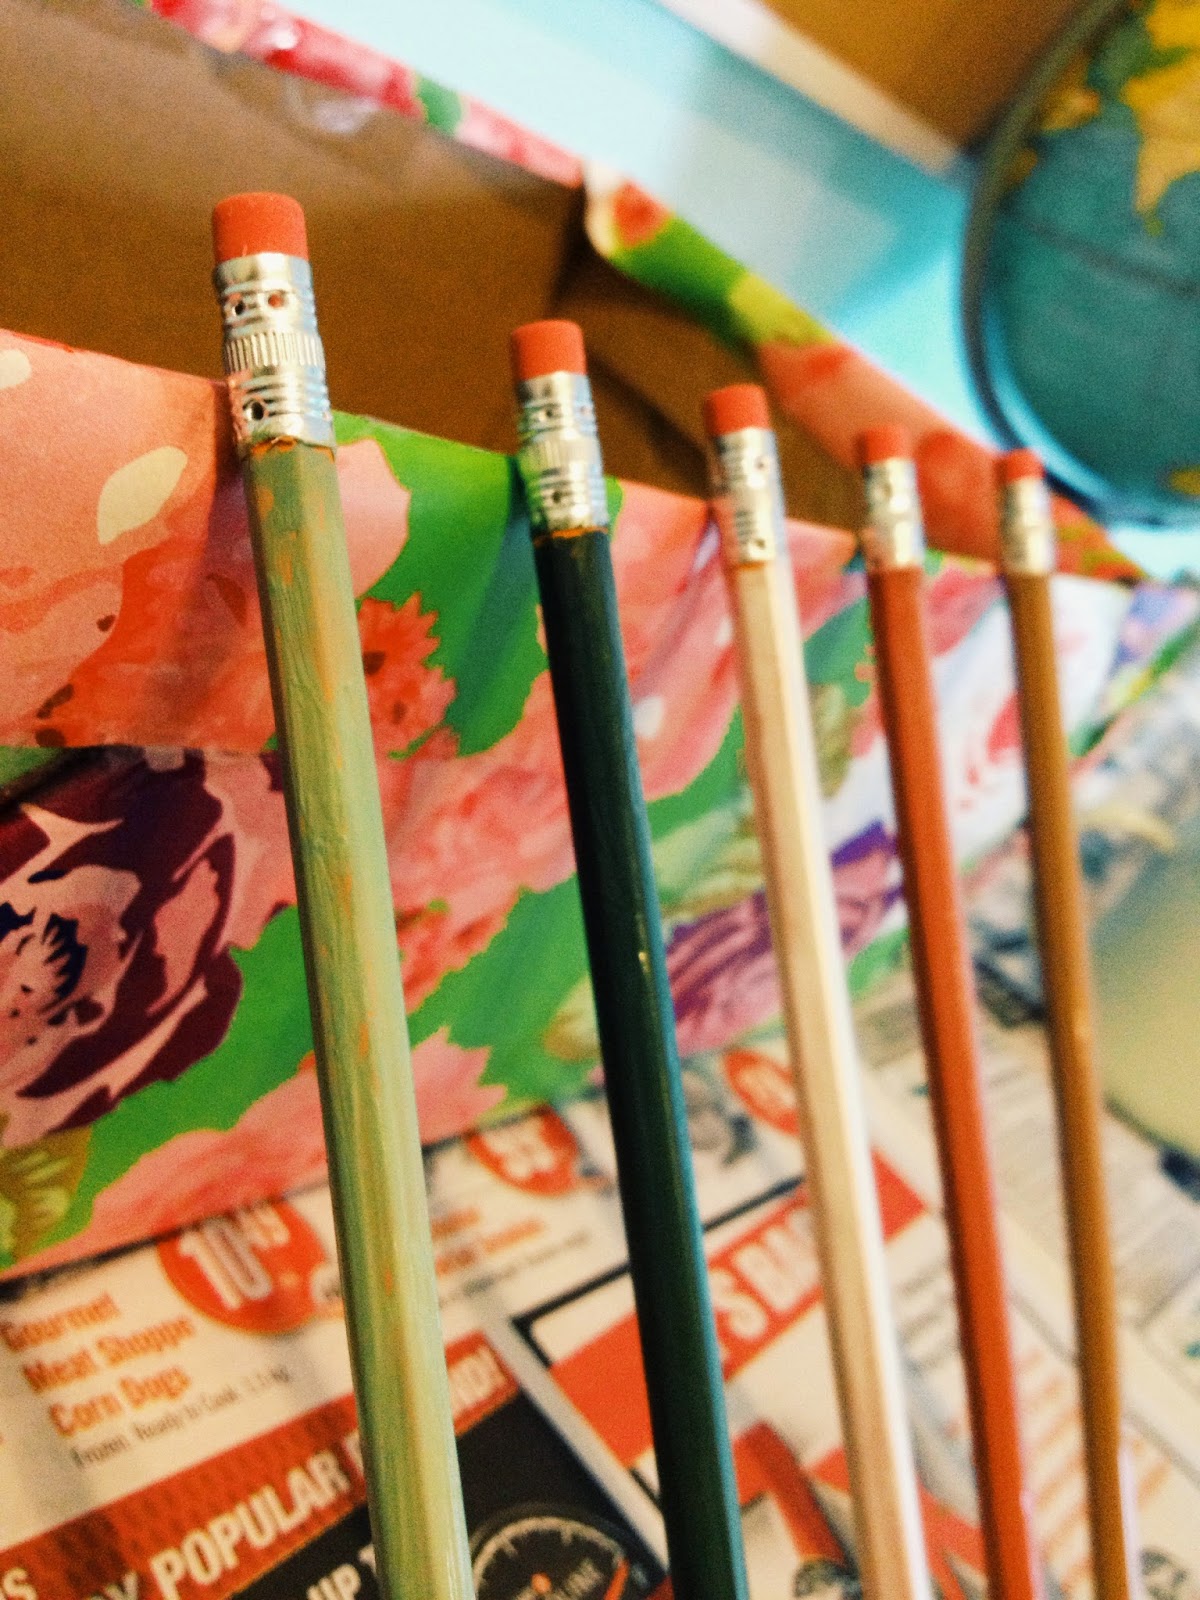
First up, are these DIY painted pencils. This is the perfect project to spice up those dull pukey colored pencils and maybe help you enjoy math class a little more. This diy is super easy, and we got this inspiration from Hello Natural


What you'll need:

  • pencils
  • paintbrush
  • wood paint
  • newspaper (you don't wanna get that white desk dirty)
  • lid to pour paint on


First, start by choosing the paint you would like to use. I chose some fall colors because we all know we keep our pencils for only a couple of weeks and then they magically disappear on us. You can also add white to colors to have different shades of each one. Now paint away!


After painting each pencil, prop those munchkins up on some sort of box, so the paint doesn't go all over the place. You can also paint another coat if you would like, but you don't have to. I found that mine needed a second coat, and then they were ready to go! 


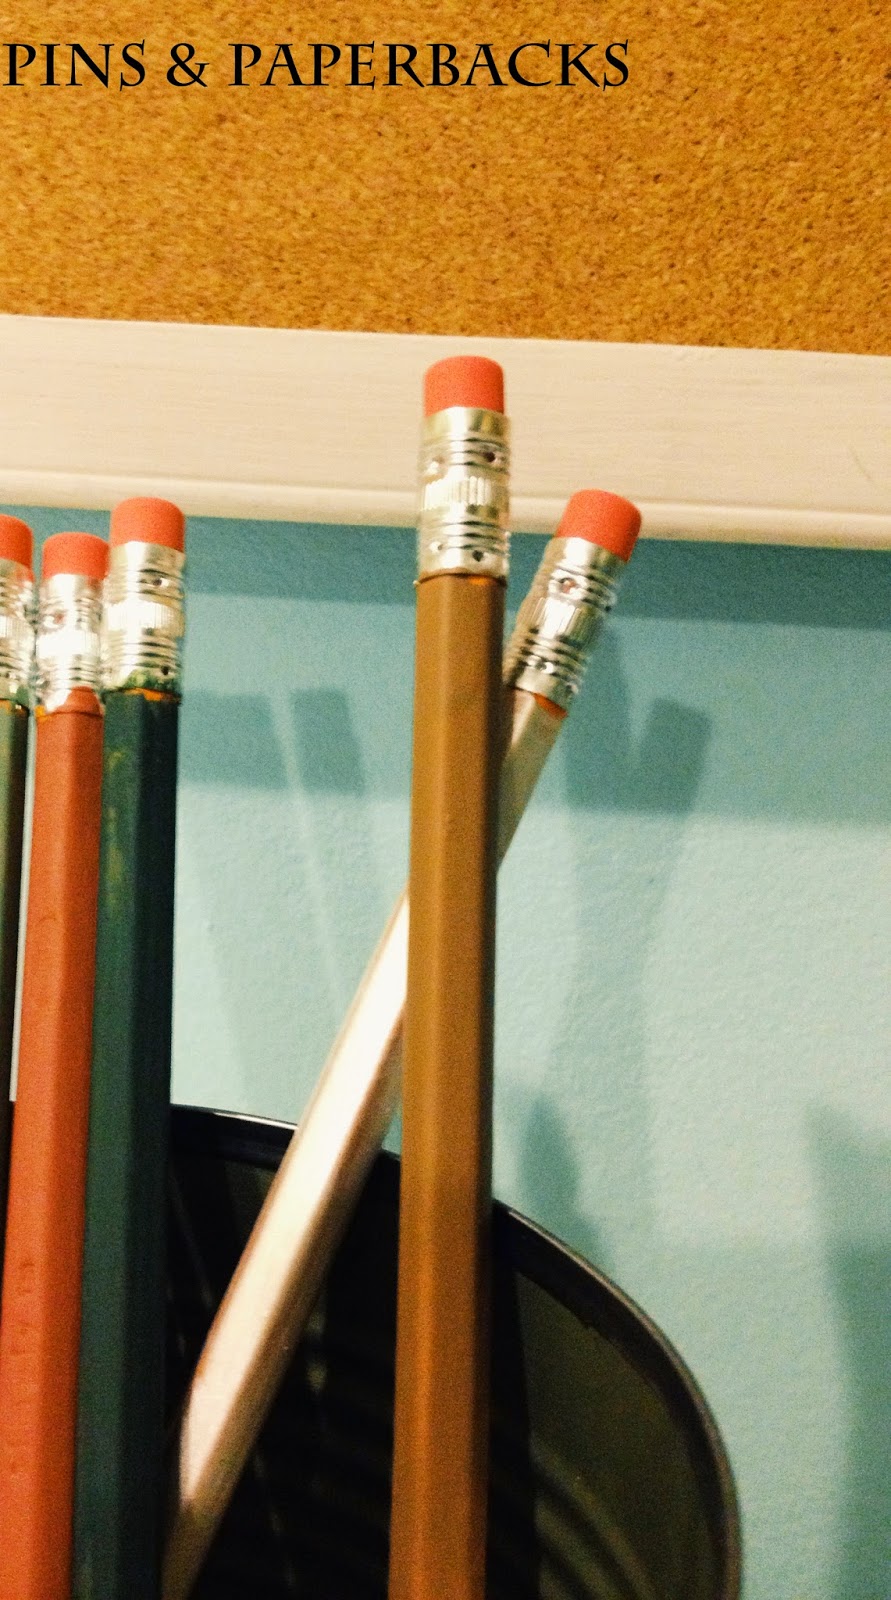
There you go! Now you have some cute, diy colored pencils! This literally takes five minutes and they end up turning out mighty fine. 


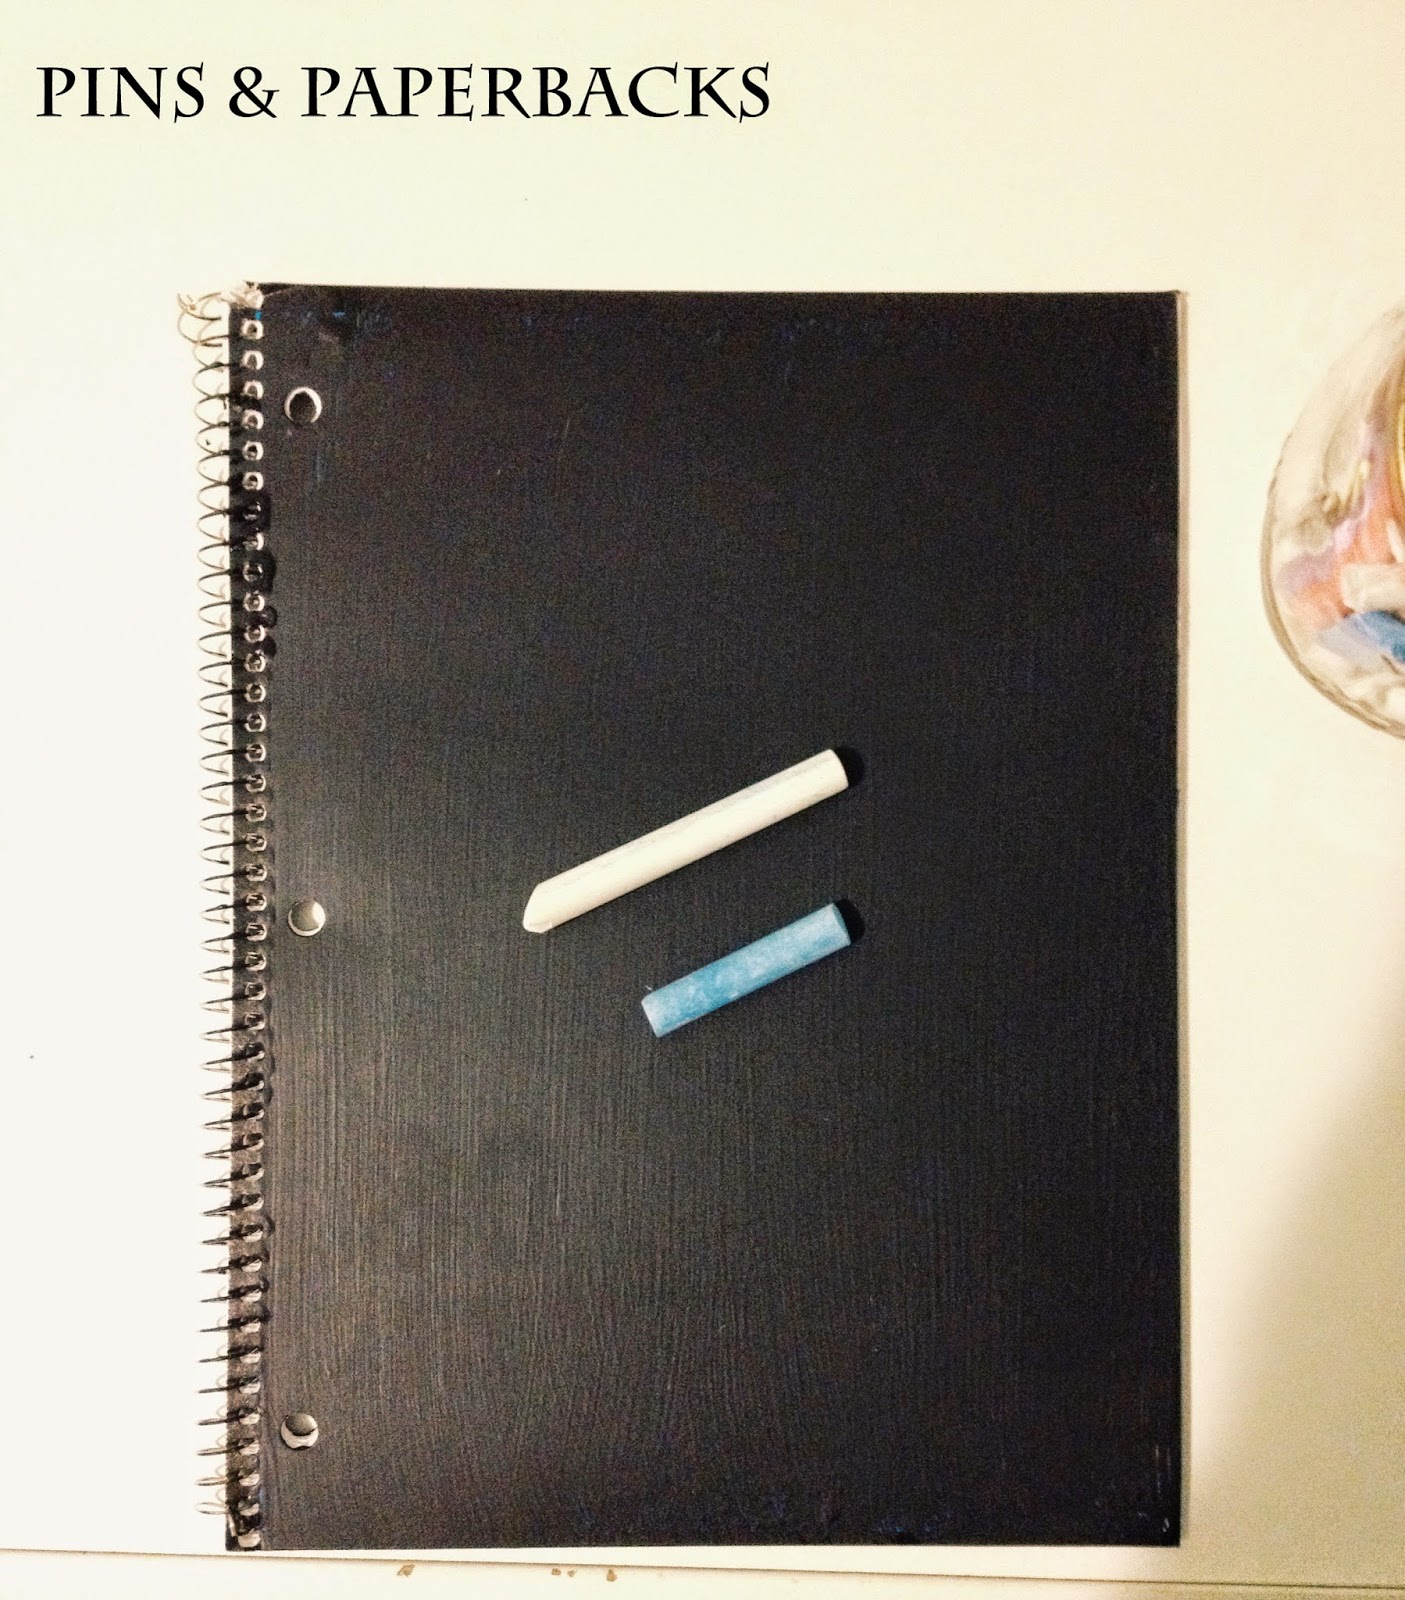
Project number two! Have you ever just gotten really bored in class and you  have the sudden urge to doodle? Well, with this notebook, you can do just that! (not when the teacher is talking though, right?) I found this DIY chalkboard notebook idea on Warm Hot Chocolate.


This diy is pretty straight forward. All you need is some good ole chalkboard paint, a classic notebook, and a paintbrush. Oh and don't forget some cardboard or newspaper so you don't get paint all over the floor. The lighting is a little weird because I had to paint in the basement because ma mere didn't want the fumes hanging out in the house, and a chalkboard on her kitchen floor.  


As you can tell, the chalkboard paint didn't show up as well on the glossy cover, so if you want to do a second coat, just wait a bit before you do it. Make sure you read the can before though, mine said to wait about four hours. 


C'est fini! This was also super easy, but the only annoying part of this project if you have to wait 3 days before you can draw on it! Patience, Mickey, patience. However, make sure you read your can, for yours may have different instructions. Isn't this delightful? Now you can doodle, write your subjects, write your name, or write notes to your friends! (again, not when the teacher is talking, right?) ;)


Last diy project is this chic scrapbook paper calendar. This will help you stay organized throughout the first couple weeks of school, and it is really fun and stylish too! Inspired by Say Yes.


What you'll need:

  • scrapbooking paper (or just scraps or construction paper)
  • scissors
  • pencil
  • sharpie
  • ruler (only if you are a perfectionist like me)
  • bulletin board
  • pushpins


First, measure and cut out your scrapbook paper into little tiny boxes. Mine were about 2" long and wide.


Once you've cut out about 30 boxes, number each one with a Sharpie or fine tip marker. Don't forget to write down the month and days of the week on paper too. I used  plain cardstock to contrast all my patterned paper. 


Lastly, pin your squares in a nice orderly fashion on your bulletin board, and ta da! Yay for organization!

Now you can write all those lovely back to school shenanigans on your calendar and admire the cute paper you used!


Well that's all for now folks. We hope you enjoyed these back to school supplies ideas. Make sure to comment; we love to hear your feedback! If you make any of these creations, you can tag them #pipablog on insta so we can check them out! And if you aren't too excited to go back to school, don't worry, we feel ya. You just gotta remember to have a positive attitude and work hard! Trust in God cause He's got your back, and have a happy school year :)

Talk to y'all soon,

With love,
Mickey & Jen 
Pins & Paperbacks Blog


Read More


Friday 22 August 2014

The Testing Book Review


Ok, so we have been meaning to do a book review for quite a long time, but after asking each other numerous times, "What book should we review?" we just shrugged and went back to whatever it was we were doing. Finally, we became determined to review a book no matter what the cost! We have noticed, though, that we have been known for doing book reviews for the second or third books in a series without actually reviewing the first book. I guess you could say, that is a problem. So, we decided to review a book that we recently read this summer and is the FIRST book in the series. Also, please take note of our the new feature to our book reviews where we review the amount of violence, sexual content, and language so y'all can make sure you don't fill your brains with garbage!

Book Review:

The future of the world belongs to a few selected candidates: ones with intelligence, bravery, and spunk. But before these young contestants can become leaders, they must pass a gruesome challenge called, The Testing. Cia Vale has been searching for something to do with the rest of her life, so when she is selected for The Testing, she is overjoyed. However, Cia's father reveals The Testing may not be as great as she thinks. Her father warns her that no one can be trusted. But when Cia reunites with Tomas, a classmate of hers who has also been chosen for The Testing, she is certain she can trust him to be apart of her alliance. And as The Testing begins, she may indeed need an alliance, as this challenge may not be like anything she has ever experienced.

Violence:A fair amount of violence, but not as extreme as most books these days. There is shooting, a teen suicide, and numerous deaths, without too much description.

Sexual Content: The only suggestive content is some mushy kisses (yuck!) and hand holding.

Language: The language is quite mild besides d--- uttered here or there and a few exclamations of h---. God's name is also declared a couple times.


Joelle Charbonneau has certainly thought of an interesting concept in her latest book, The Testing, but we had to stop and ask the question, "Doesn't this plot line sound a bit familiar?" To be honest, we couldn't help but compare this book to the ever so famous The Hunger Games and when we did compare the two, we would have to say that Suzanne Collins' dystopian sci-fi novel was a bit more exciting. Nevertheless, we did enjoy some aspects of this book. The first couple rounds of The Testing had us eager to find out what was going to happen next and the mysterious aspect of this novel kept us engaged for a few more chapters. However, this read did lack a couple of things, one being emotion and character. We felt as if Cia did not have much depth or layers to her personality. That being said, we found it a little difficult to get through this book. The similarity of this novel and other dystopian fiction caused us to pound our heads in frustration and ask each other why authors cannot come up with more original ideas.
We rate this book
3 of 5 sta
Hope you enjoyed our book review and be sure to comment below any suggestions you have (books, diys, etc.)! We love hearing from y'all!
With love,
Mickey & Jen 
Pins & Paperbacks Blog

Read More


Thursday 14 August 2014

DIY Recovered Folding Chairs


I had recently gotten a "new" desk for my room and in all the excitement about welcoming a new edition to my humble abode, I realized that I still had one of those cheap, boring, black folding chairs as a seat for my desk. I know, not very attractive. And then I remembered seeing a tutorial on Whipperberry for how to spice up your folding chairs and I knew that this was indeed what I needed to do! This is a pretty easy project, so you might even be able to do this to a couple more chairs for a special occasion.


These chairs would be perfect for parties or even just your room! Ok, let's start this puppy. 


You will need:

  • A folding chair 
  • Fabric (about 1/2 a yard for one chair)
  • A screw driver
  • A staple gun
  • Scissors
  • The screws from your chair 
Note: Some people spray paint their chairs but I decided to leave mine black. 


First, unscrew each screw with your handy dandy screw driver. Set your screws aside where you won't be able to step on them (ouch) because you will need them later. You can do this to the seat, the top, or both like I did. 


Next, lay out each piece on top of the fabric.


Now its time to cut out your fabric to make sure it wraps around the cushions. 


Next, taking your stapler gun, staple the fabric tightly to the pads, making sure the pattern isn't crooked on the other side. You may need to call the man in your life to help you. (in this case, that would be my father) You can trim the excess fabric if you like, but it isn't necessary because you won't be seeing this part of the chair. 


Once you are done stapling the fabric to both pads, it is time to put those screws back in. Make sure you push hard to make sure the screws go in properly. Time to use those muscles ladies! Once you do that, you are done!


Well then.. Uh huh.. Ok. That failed. If this happens to you, just unscrew those ridiculous screws, flip that cushion around and screw them back in again. And don't beat yourself up cause this is actually pretty funny, though I highly doubt this will happen to you because, YOU HAVE BEEN WARNED. 
** Note: in the picture shown where I was screwing the screws back in, it was the right way. 


So back to screwing them in again. I can say for sure now, that I am an expert at using a screw driver, just saying. Now for unfolding it.......


Yay! It's the right way! And yes, I did test it out to make sure it is still useable. So now you have yourself a cute lil' chair for your room. See that wasn't too hard, eh? If you have a chance to make one of these DIY  recovered folding chairs, back sure to tag it #pipa on Instagram.


So there you have it folks, I hope you enjoyed this tutorial. Make sure to comment below, we love your feedback. By the way, here is a snapshot of some of our summer reading. Stay tuned for a book review soon! 

With love,
Mickey & Jen 
Pins & Paperbacks Blog


Read More


Wednesday 6 August 2014

DIY Brandy Melville Arielle Top Tutorial


Hey guys! We've always admired Brandy Melville, with all their trend setting and inexpensive clothing, but because we aren't exactly close to their stores, we decided to design our very own tutorial on one of their ever popular tees. Besides, why buy something new when you can easily make it yourself? Without further ado, we present to you our very own Brandy Arielle Top Tutorial.

Kinda looks like the original one, eh? Anyways, this tutorial is fairly basic. As long as you follow the directions, you should get a shirt lookin' like this. Of course, you can do whatever colors you want, like red or grey, etc; we just did a fairly staple shirt. Ok, let's begin.
Materials:
  • Pins
  • Sewing Machine
  • Scissors
  • Basic pocket pattern (I got mine from here)
  • A plain long sleeved (a t-shirt still works)
  • Contrasting plain fabric scrap or tee (I used a DIY gone bad shirt, you don't need too much fabric) 
  • Thread
  • Optional: bias tape (I made my own, tutorial included below)
  • Iron and Ironing board
Step One: Find a pocket stencil pattern. Cut out pattern.

Step Two: Pin pattern to contrasting fabric. Make sure you pin on corners especially if you are using knit, like me. Cut along the line.

Your pocket should look something like this. Don't be afraid to cut generously around corners to add extra width. I had to remake my pocket because I cut it too small.

Step three: Head on over to the iron and fold over every side a quarter inch. (EXCEPT top of pocket. Don't fold that baby over quite yet. We'll get to that later)  Make sure it's good and ironed. 


Step four: Now we get  to the top of pocket. Fold over about an inch, or until you're satisfied with your pocket.

It should look something like this:

Step five: Here's where your sewing machine comes into play. Pin the folded edge at the top of the pocket, and sew following the edge of your presser foot. You don't need to backstitch.(NOTE: if you are using knit, use a ballpoint needle.)

On the actual shirt from Brandy, they topstitched their pocket, so I sewed an extra line beside my other one. This is how it should look like.


Step six: Now we're going to mark where the pocket is going. Try on your plain tee and put a pin where you want the pocket. I put mine on the left, above my elbow and by my armhole. This is how it is with the original Brandy shirt.

Step seven: Take off the shirt and carefully pin the pocket in place, making sure the folded corners are tucked nicely under the pocket and that both sides are even and straight. It should look like this: 

Step eight: It's coming together! Ok, following the edge of your fabric, sew the entire pocket, pivoting at the corners and backstitching at the very top of your pocket on each side. Make sure it looks pretty, because if you are using knit fabric, like me, it's really hard to seam rip, as the fabric is rather delicate. Ok, I'll admit it. I've done it before and it looks AWFUL. So don't make the same mistakes.  

Voila! You have a pocket.

Ok now onto the neckline. I hate really scratchy turtleneck necklines. If you like 'em, skip this step, by all means.

Step nine: I cut mine out, cutting along the previous neckline. Do whatever you want. I'll give you some creative freedom on this one. (Note: on the original top, the neckline is not swooping)

Mine looked like this. 

Step ten: Now we're gonna talk about sleeves. If you are using a t-shirt, don't worry too much about this, you don't want to cut your sleeves any shorter! I used a long sleeve, so I cut my sleeves about 6-6 1/2 inches from the shoulder.

Once you've measured them and marked them, cut those babies off.

Lookie here, you've got some fine looking sleeves.

Step 11:  Cut and measure 3 inches by 10 inches. Do this three times, having a total length of 30 inches. If you don't have enough for the length of 10 inches, just cut as many strips 3 inches wide until you have 30''. (Note: if you are using bias, skip these few steps)

Step 12: We're on the home stretch now, kids. Place two strips on top of each other so it makes an 'L' shape. With a ruler, mark diagonally at the two outside corners (if you have no clue, look at my blurry example), making sure the ruler touches both corners with a slant. Mark this and pin in place.

Sew on the line EXACTLY. BE SURE that the corners match up!

Repeat step 12 until you have about 30 inches of fabric, all connected together and looking mighty pretty. Each diagonal should look like this. But, if you have absolutely no idea what's going on right now, let me know in the comments box below and I'll be happy to help you. No worries :)

Step thirteen: Turning the strip to inside, cut off the excess fabric triangles. 

 Now, iron the strips, so they lay flat.

Step fourteen: Fold the entire strip in half, I think hot dog style? and iron.


Unfold the ironed fabric (you did this so you'd have a mark in the middle). Fold over each side of the strip so each side meets the middle. Iron the sides over. It should look something like this. (Please ignore the blurry pic)


 Fold the strip one more time in half, with the flaps tucked on the inside. Iron.


Step fifteen: You've got yourself a bias tape. Still with me? Ok, now we're going to attach this baby onto the shirt neckline, starting at the back of the shirt, pin the tape so that the one half sits on the inside of the shirt, and the other sits on the outside. In other words, place the middle on the edge of the shirt and fold over the sides. If this doesn't make sense, don't be afraid to contact me and we can chat!

Do this around the neckline, pinning as you go, until you meet the beginning point. Cut off the excess strip (don't throw away, we'll be using it in the next steps) and fold over the end. Pin it to the shirt so it looks like one continuous loop.

It should kinda look like this when it's all done.

Step sixteen: Sew along the very edge of the neckline (where your two flaps are).

Top stitch. 

Step seventeen: do the same thing for the sleeves as you did for the neckline except you don't have to finish you're ends. If you run out of fabric don't worry. We'll talk about that later. Don't forget to topstitch!

You're almost there!

Step eighteen: Why don't you go right ahead and try on your new tee. Ok, so you're probably a little bit mad right now because the sleeves don't really look, um, normal. Don't you worry. I'm here to fix that minor issue. If you like how your sleeves look, then congratulations you're finished. Glad you could join us... 
Ok, back to the issue. What you're going to do now to make the sleeves tighter is to turn your shirt inside out and fold it so the shoulder seam is faced up. Pin both layers of your shirt together. Sew a straight line to the shoulder seam, connecting your line with the tee's line. 

Cut off the excess fabric and iron. Then you are finished! YAYAYAYA, you've made your very own color block shirt! If you're excited as we are, hashtag your tee #pipa on Instagram. We'd love to see your creations! 


Thanks for joining us today on the blog! We hope your t-shirts turned out good. Be sure to comment and follow us on Instagram, Goodreads, Pinterest, and Google Plus for more updates! 


With love,
Mickey & Jen 
Pins & Paperbacks Blog


Read More


Return to top of page
Powered By Blogger | Design by Genesis Awesome | Blogger Template by Lord HTML