


Hey guys! We've always admired Brandy Melville, with all their trend setting and inexpensive clothing, but because we aren't exactly close to their stores, we decided to design our very own tutorial on one of their ever popular tees. Besides, why buy something new when you can easily make it yourself? Without further ado, we present to you our very own Brandy Arielle Top Tutorial.


Kinda looks like the original one, eh? Anyways, this tutorial is fairly basic. As long as you follow the directions, you should get a shirt lookin' like this. Of course, you can do whatever colors you want, like red or grey, etc; we just did a fairly staple shirt. Ok, let's begin.
Materials:

- Pins
- Sewing Machine
- Scissors
- Basic pocket pattern (I got mine from here)
- A plain long sleeved (a t-shirt still works)
- Contrasting plain fabric scrap or tee (I used a DIY gone bad shirt, you don't need too much fabric)
- Thread
- Optional: bias tape (I made my own, tutorial included below)
- Iron and Ironing board
Step One: Find a pocket stencil pattern. Cut out pattern.

Step Two: Pin pattern to contrasting fabric. Make sure you pin on corners especially if you are using knit, like me. Cut along the line.

Your pocket should look something like this. Don't be afraid to cut generously around corners to add extra width. I had to remake my pocket because I cut it too small.
Step three: Head on over to the iron and fold over every side a quarter inch. (EXCEPT top of pocket. Don't fold that baby over quite yet. We'll get to that later) Make sure it's good and ironed.

Step four: Now we get to the top of pocket. Fold over about an inch, or until you're satisfied with your pocket.

It should look something like this:

Step five: Here's where your sewing machine comes into play. Pin the folded edge at the top of the pocket, and sew following the edge of your presser foot. You don't need to backstitch.(NOTE: if you are using knit, use a ballpoint needle.)

On the actual shirt from Brandy, they topstitched their pocket, so I sewed an extra line beside my other one. This is how it should look like.

Step six: Now we're going to mark where the pocket is going. Try on your plain tee and put a pin where you want the pocket. I put mine on the left, above my elbow and by my armhole. This is how it is with the original Brandy shirt.

Step seven: Take off the shirt and carefully pin the pocket in place, making sure the folded corners are tucked nicely under the pocket and that both sides are even and straight. It should look like this:

Step eight: It's coming together! Ok, following the edge of your fabric, sew the entire pocket, pivoting at the corners and backstitching at the very top of your pocket on each side. Make sure it looks pretty, because if you are using knit fabric, like me, it's really hard to seam rip, as the fabric is rather delicate. Ok, I'll admit it. I've done it before and it looks AWFUL. So don't make the same mistakes.

Voila! You have a pocket.

Ok now onto the neckline. I hate really scratchy turtleneck necklines. If you like 'em, skip this step, by all means.

Step nine: I cut mine out, cutting along the previous neckline. Do whatever you want. I'll give you some creative freedom on this one. (Note: on the original top, the neckline is not swooping)

Mine looked like this.

Step ten: Now we're gonna talk about sleeves. If you are using a t-shirt, don't worry too much about this, you don't want to cut your sleeves any shorter! I used a long sleeve, so I cut my sleeves about 6-6 1/2 inches from the shoulder.

Once you've measured them and marked them, cut those babies off.

Lookie here, you've got some fine looking sleeves.

Step 11: Cut and measure 3 inches by 10 inches. Do this three times, having a total length of 30 inches. If you don't have enough for the length of 10 inches, just cut as many strips 3 inches wide until you have 30''. (Note: if you are using bias, skip these few steps)

Step 12: We're on the home stretch now, kids. Place two strips on top of each other so it makes an 'L' shape. With a ruler, mark diagonally at the two outside corners (if you have no clue, look at my blurry example), making sure the ruler touches both corners with a slant. Mark this and pin in place.

Sew on the line EXACTLY. BE SURE that the corners match up!

Repeat step 12 until you have about 30 inches of fabric, all connected together and looking mighty pretty. Each diagonal should look like this. But, if you have absolutely no idea what's going on right now, let me know in the comments box below and I'll be happy to help you. No worries :)

Step thirteen: Turning the strip to inside, cut off the excess fabric triangles.

Step fourteen: Fold the entire strip in half, I think hot dog style? and iron.

Unfold the ironed fabric (you did this so you'd have a mark in the middle). Fold over each side of the strip so each side meets the middle. Iron the sides over. It should look something like this. (Please ignore the blurry pic)


Fold the strip one more time in half, with the flaps tucked on the inside. Iron.

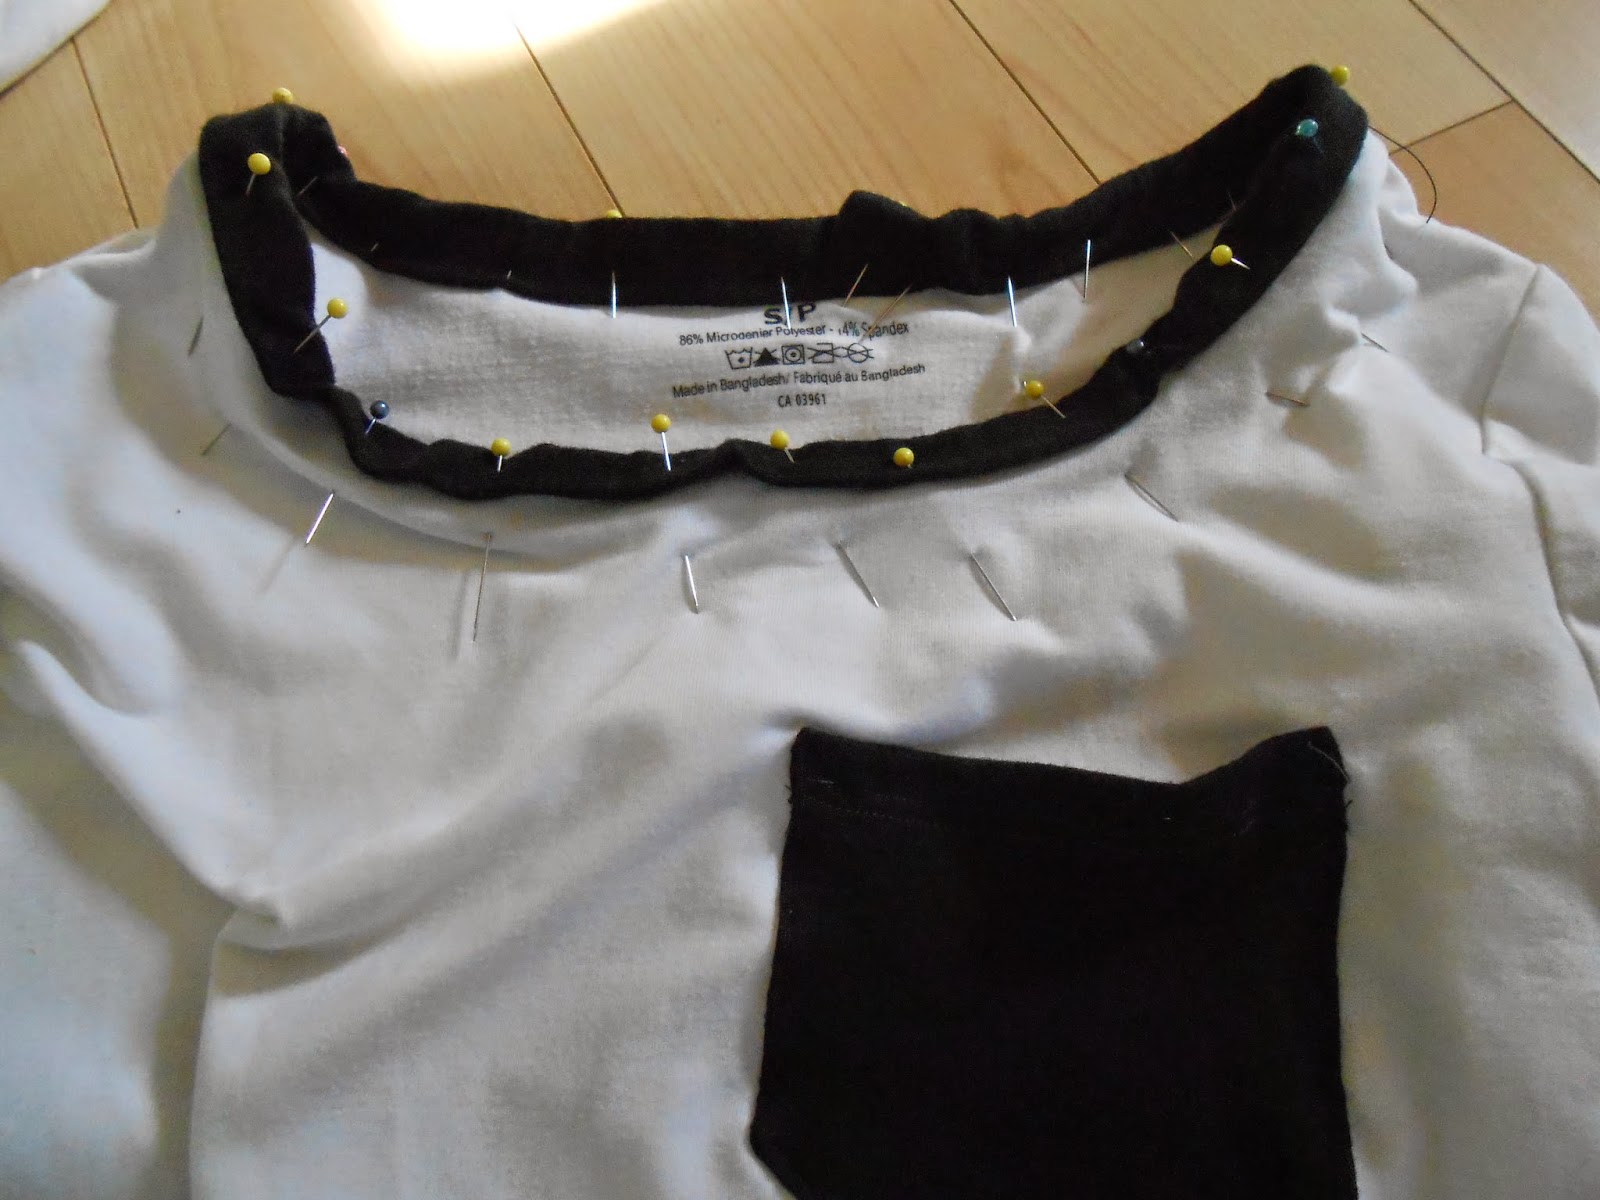
Step fifteen: You've got yourself a bias tape. Still with me? Ok, now we're going to attach this baby onto the shirt neckline, starting at the back of the shirt, pin the tape so that the one half sits on the inside of the shirt, and the other sits on the outside. In other words, place the middle on the edge of the shirt and fold over the sides. If this doesn't make sense, don't be afraid to contact me and we can chat!

Do this around the neckline, pinning as you go, until you meet the beginning point. Cut off the excess strip (don't throw away, we'll be using it in the next steps) and fold over the end. Pin it to the shirt so it looks like one continuous loop.

It should kinda look like this when it's all done.
Step sixteen: Sew along the very edge of the neckline (where your two flaps are).

Top stitch.

Step seventeen: do the same thing for the sleeves as you did for the neckline except you don't have to finish you're ends. If you run out of fabric don't worry. We'll talk about that later. Don't forget to topstitch!

You're almost there!

Step eighteen: Why don't you go right ahead and try on your new tee. Ok, so you're probably a little bit mad right now because the sleeves don't really look, um, normal. Don't you worry. I'm here to fix that minor issue. If you like how your sleeves look, then congratulations you're finished. Glad you could join us...
Ok, back to the issue. What you're going to do now to make the sleeves tighter is to turn your shirt inside out and fold it so the shoulder seam is faced up. Pin both layers of your shirt together. Sew a straight line to the shoulder seam, connecting your line with the tee's line.

Cut off the excess fabric and iron. Then you are finished! YAYAYAYA, you've made your very own color block shirt! If you're excited as we are, hashtag your tee #pipa on Instagram. We'd love to see your creations!


Thanks for joining us today on the blog! We hope your t-shirts turned out good. Be sure to comment and follow us on Instagram, Goodreads, Pinterest, and Google Plus for more updates!
♡
With love,
Mickey & Jen
Pins & Paperbacks Blog
No comments:
Post a Comment